I've been working on this for awhile and I am SO excited to finally be sharing it! It is my favorite piece in my kitchen and was so easy to make. Since I'm rather new at this you'll have to please excuse the picture quality and image sizing and all that, I'm still learning and figuring it out! So here we go!
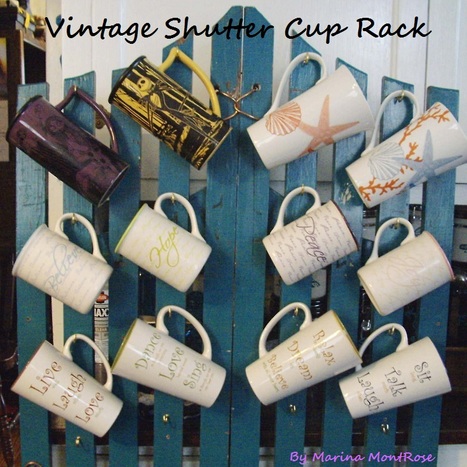
Vintage Shutter Cup Rack
I have a decent sized kitchen with a fair amount of storage space but with white cabinets, pale tan walls and a dark stain wood floor, it was definitely in need of some color! I decided on a teal color palette and have added a few little things here and there, but what I really wanted was something that would be eye catching while also being functional. I love functional art and I also love organizing and this piece offers both!
I had all these cups that were taking up my cabinet space and I knew I wanted to do something with them, but I hadn't figured out what. Then one day while perusing Varagesale, I came cross these vintage teal shutters. They were gorgeous! They had such an awesome shape, not just plain squared edges, they were tall and narrow and best of all, they were the perfect color. No painting required. I didn't hesitate and within a few days, they were mine (for only $35!).
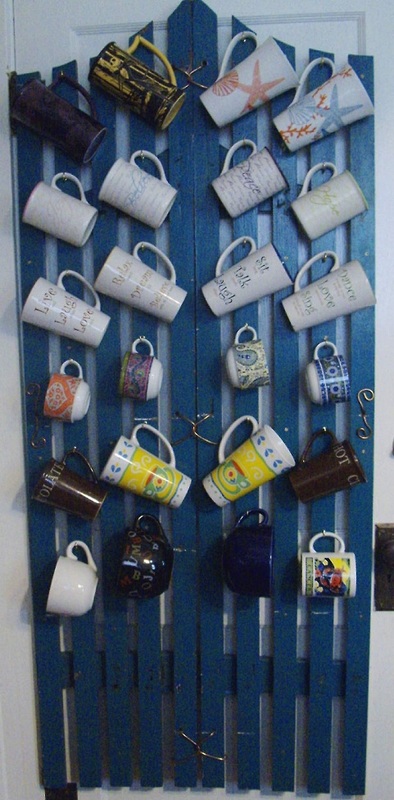
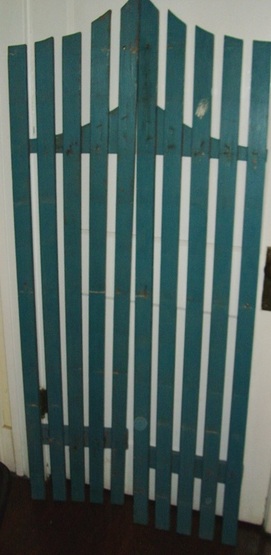
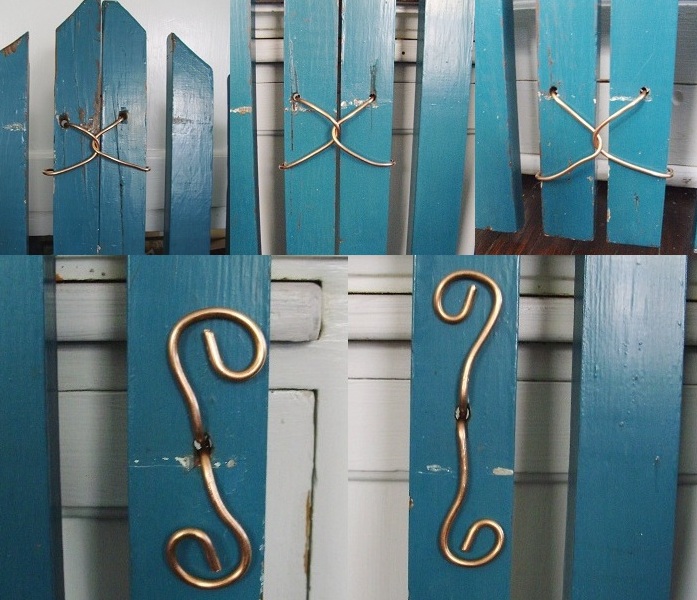
The picture doesn't do them justice and they were covered in an orange-y sawdust film that I had to scrub off which made the color look darker than it really was. What you also cant really see is all the little nicks and chips that made these shutters even more great. Trust me, each imperfection just added more charm and character. So to make these into the cup rack, first I had to connect them together so they would be one solid piece. I did this by screwing in a small board on the back (under the board already there) in two places so that they were firmly connected. After that I added some simple copper wire accents that I thought enhanced the vintage look and feel.
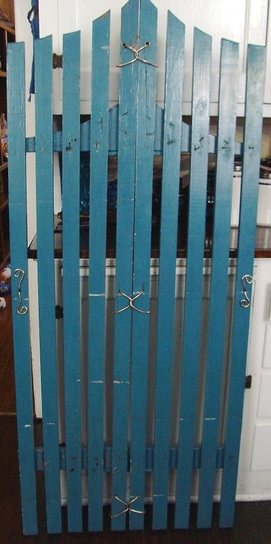
Once that was done it was time to add my cup hooks. Since I have some larger cups, those are the measurements I used for all the spacing. I didn't make it all complicated with a ruler or anything, I simply held the cup, made a mark, moved it down and repeat. Right now there are 24 cups on it, but I actually have room for two more rows, so 8 more cups. I have decided to leave those two rows off for now since I also have a curious toddler running around. I can always add those in later. So 24 cups for now, and eventually 32, makes this cup rack large and eye catching while definitely being functional! It hangs on the back of my basement door across from the stove so it gets seen and appreciated daily!
I hope you enjoyed this post as much as I did making it and I hope that it might inspire someone to make their own awesome cup rack! Thanks for reading!
~Marina MontRose
~Marina MontRose

 RSS Feed
